Playbooks Solution for Computer-Based Calling
How to use Computer-based Calling in Playbooks
Playbooks gives reps the flexibility to connect the agent leg either with a phone system (PTSN) or through their computer and internet connection. Computer-based calling creates an Agent Leg and records activity to CRM the same as Phone-based calling but uses the Chrome browser and microphone to complete the call.
How Computer-based Calling Works
Computer-based Calling utilizes the open internet to connect the Agent Leg of a call, in contrast to the traditional telephone network.
It requires:
- A modern computer with speakers or headphones and a microphone
- Chrome web browser
- Sufficient internet bandwidth
- Network configuration if restricting traffic outside domains and IPs
When Computer-based Calling is enabled and a call is initiated in Playbooks, the web browser will activate your microphone and speakers. At this point, the Agent Leg has been connected. Next, Playbooks will use the traditional phone network (PSTN) to call the prospect to establish the Client Leg. That means, you’ll hear ringing from your speakers or headphones and be able to speak as soon as your contact answers the call. When the call is finished, you’ll click the red END button, just like you would with regular telephony, and the client leg will be disconnected. If you need to navigate a phone tree while on the call, the dial pad in Playbooks can be used.
Computer-based Calling must be enabled for each Playbooks org (that includes sandboxes). Talk to your Customer Success Manager or XANT Support to request the option be enabled. Once Computer-based Calling function has been enabled, Playbooks Administrators can enable “Computer Based Calling” and/or “Phone Based Calling” for the entire team using team permission groups. By authorizing both options, Administrators are allowing individual users to set their own calling method preferences in their personal settings. There are ways an administrator can force sellers to use either Phone or Computer-based calling.
You can learn more about Computer-based calling and other telephony related setup options by discussing it with your Technical Consultant or Support Engineer.
Enabling Calling Preferences
Before your reps can make Computer-based calls, Computer-based Calling needs to be turned on for your organization. Contact XANT support to enable Computer-based calling for your company.
Once Computer-based calling privileges are granted to your organization, managers and admins should set which teams have permission to change their Call Preferences. If teams don’t have permission to change these preferences, users will only be able to use the default Call Preference unless their manager changes this preference for them manually.

To Enable Calling Preferences for a Team
- Log into the Playbooks Manager app.
- Navigate to the Settings.
- Select Permission Group.
- Create a new Permission Group
-OR-
Edit an existing Permission Group. - Navigate to the Phone Settings
- Select which Calling Preferences you want users to be able to select.
NOTE: Users can only select Call Preferences if permissions for that preference is turned on. For users to be able to switch between Computer-based Calling and Phone-based Calling you must turn on both permissions. - Click SAVE.
Phone-based calling or Computer-based calling can be assigned to users through the Playbooks Manager’s app. User’s must have Permission for the assigned calling preference before they’ll be able to use it to place calls. Managers should make sure the user has been granted the proper permission for whichever calling preferences is being assigned. After a manager has changed user’s permissions, the user may need to log out and log back in before the changes to calling preferences take place.
To Set a User’s Calling Preference from Teams Page
- Open the Playbooks Manager Application.
- Click the Teams tab.
- Click a Team name.
- Click the vertical ellipsis to the right of the agent’s name.
- Click Edit.
- Navigate to Calling Preference.
- Click Change.
- Select the desired Calling Preference.
- Click SAVE.

To Set a User’s Calling Preference from People Page
- Open the Playbooks Manager Application.
- Click the Teams tab.
- Click PEOPLE.
- Click the vertical ellipsis to the right of the agent’s name.
- Click Edit.
- Navigate to Calling Preference.
- Click Change.
- Select the desired Calling Preference.
- Click SAVE.
Users can change their own Calling Preferences to whatever option(s) they have permissions for. When they go to select their Calling Preference, the drop-down menu only shows those option(s) with one exception. If manager changes their user’s call preferences to an option they don’t have the ability to switch to on their own, the user momentarily see both calling preference options when they go to change their calling preference back. Once they switch to the calling preference they have access to, they will no longer see the other option in the drop-down menu. This is purposeful and expected function.
To illustrate this, imagine the manager changed their user’s call preferences to Computer-based Calling. Now the user is going to switch back to Phone-based calling. When the rep changes their Calling Preference, they see both Computer-based Calling and Phone-based Calling as selection options. They select Phone-based Calling and save. If the user later goes to try to change their Calling Preference back to Computer-based Calling, they will no longer have that as a selection option in their Calling Preferences.

To Set Calling Preferences as a User in Playbooks
- Open Playbooks.
- Click the menu button (XANT logo).
- Click Settings.
- Click Phone.
- Navigate to Calling Preference and click Edit.
- Select the desired Calling Preference.
- Click SAVE.
Enabling Microphone for Computer-based Calling
When using Computer-based calling, you must allow Google to access your microphone to be able to make web calls. The Chrome browser is connecting the call, so it must have access to your microphone for the customer to hear your voice. You can enable Google to access your microphone from the pop-up that appears the first time you attempt to make a Computer-based call.
To Enable You Microphone with the Pop-up
- Change your Calling Preferences to Computer-based calling.
- If this is the first time you’ve changed Calling Preferences to Computer-based calling, Google requests access to your microphone.
- On the pop-up requesting access to your microphone, click Allow.
NOTE: Playbooks will only use your microphone even if the pop-up asks for camera permissions. The pop-up language is set by Google and isn’t changeable by XANT. - Make your calls as normal.
The pop-up might state that Google is going to use both camera and microphone, but the camera will not be accessed. This pop-up is generated by Google and is their generic pop-up for communication. This should only need to happen the first time you change Calling Preferences to Computer-based calling. If Google’s access to your microphone is ever blocked, Playbooks notifies you Google’s access to your microphone has been blocked.
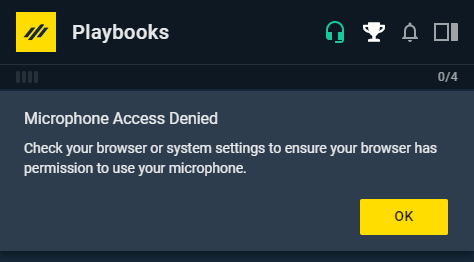
The pop-up should appear again asking for permission when you reload Playbooks.
You can also allow Google access by going through the browser settings.
To Enable Your Microphone Through Chrome
- Change your Calling Preferences to Computer-based calling.
- Click the three dots in the top right-hand corner of the browser.
- Click Site Settings.
- Click View permission and data stored across sites.
- Navigate to the insidesales-playbooks.com app and click the drop-down arrow.
NOTE: It may be listed under Recent Activity on the previous screen. - Under permissions, find Microphone.
- Click the drop-down menu and select allow.
- Reload the Playbooks window.
Keep in mind the browser tab you initiated the call in needs to stay open during the call. Closing the tab or refreshing the tab causes the call to disconnect. Google should show a pop-up asking if you’d sure you want to navigate away before the tab closes or refreshes which should help prevent the call from disconnecting accidentally.
Once you start a call, you will see a red icon at the top of your browser. Even though this icon indicates Google is recording, it is NOT. This icon simply means that the microphone is being used to pick up your voice. Computer-based calls still follow whatever call recording settings your organization has enabled.
Playbooks uses your headset, speakers, or whatever you have connected. If you are having issues being heard, go through the Computer-based Calling Troubleshooting to try to correct the problem.
Network Bandwidth Requirements
Computer-based calling uses 100 kbps internet bandwidth. This amount is accounted for in the 1 mbps Playbooks requires for typical use. If you have the proper bandwidth to run Playbooks, you should be able to make Computer-based calls without any usage issues.
Additionally, latency (RTT) should be less than 200 ms and Jitter should be less than 30 ms for reasonable audio quality.
For more information on Playbooks requirements, review this article.
Network Configuration
Playbooks uses Twilio’s Programmable Voice Infrastructure for all Computer-Based Calling. Therefore, organizations wishing to use this feature will need to allow Twilio’s Signaling and Media traffic in order to send and receive audio through the firewall. Furthermore, for best QoS (Quality of Service), we recommend this traffic to be prioritized on local network.
The specifications below detail connectivity requirements to Signaling gateways and Media servers.
| Protocol | Purpose | Source IP | Source Port † | Destination | Destination Port | |
|---|---|---|---|---|---|---|
| Twilio Client JS | ||||||
| Secure TLS connection to Twilio signaling Gateway | TCP | Signaling | ANY | ANY | chunderw-gll.twilio.com | 443 |
| Secure TLS connection to Twilio signaling Gateway | TCP | Signaling | ANY | ANY | chunderw-vpc-gll.twilio.com | 443 |
| Secure TLS Connection to Twilio Regional Signaling gateways | TCP | Signaling | ANY | ANY | chunderw-vpc-gll-{region}.twilio.com
{Where region is one of: au1, br1, de1, ie1, jp1, sg1, us1} |
443 |
| Secure TLS Insights logging gateway | TCP | Signaling | ANY | ANY | eventgw.twilio.com | 443 |
| Secure Media (ICE/STUN/SRTP) Edge Locations | ||||||
| sydney (au1) | UDP | Media | ANY | ANY | 54.252.254.64 – 54.252.254.127, 3.104.90.0 – 3.104.90.255 |
10,000 – 20,000 |
| sydney (au1) | TCP & UDP | STUN Connection | ANY | ANY | 13.210.2.128 – 13.210.2.159, 54.252.254.64 – 54.252.254.127, 3.25.42.128 – 3.25.42.255 |
443, 3478 (TCP and UDP), 5349 TCP |
| sao-paulo (br1) | UDP | Media | ANY | ANY | 177.71.206.192 – 177.71.206.255, 18.228.249.0 – 18.228.249.255 |
10,000 – 20,000 |
| sao-paulo (br1) | TCP & UDP | STUN Connection | ANY | ANY | 18.231.105.32 – 18.231.105.63, 177.71.206.192 – 177.71.206.255, 18.230.125.0 – 18.230.125.127 |
443, 3478 (TCP and UDP), 5349 TCP |
| dublin (ie1) | UDP | Media | ANY | ANY | 54.171.127.192 – 54.171.127.255, 52.215.127.0 – 52.215.127.255 |
10,000 – 20,000 |
| dublin (ie1) | TCP & UDP | STUN Connection | ANY | ANY | 52.215.253.0 – 52.215.253.63, 54.171.127.192 – 54.171.127.255, 52.215.127.0 – 52.215.127.255, 3.249.63.128 – 3.249.63.255 |
443, 3478 (TCP and UDP), 5349 TCP |
| frankfurt (de1) | UDP | Media | ANY | ANY | 35.156.191.128 – 35.156.191.255, 3.122.181.0 – 3.122.181.255 |
10,000 – 20,000 |
| frankfurt (de1) | TCP & UDP | STUN Connection | ANY | ANY | 52.59.186.0 – 52.59.186.31, 18.195.48.224 – 18.195.48.255, 18.156.18.128 – 18.156.18.255 |
443, 3478 (TCP and UDP), 5349 TCP |
| tokyo (jp1) | UDP | Media | ANY | ANY | 54.65.63.192 – 54.65.63.255, 3.112.80.0 – 3.112.80.255 |
10,000 – 20,000 |
| tokyo (jp1) | TCP & UDP | STUN Connection | ANY | ANY | 13.115.244.0 – 13.115.244.31, 54.65.63.192 – 54.65.63.255, 18.180.220.128 – 18.180.220.255 |
443, 3478 (TCP and UDP), 5349 TCP |
| singapore (sg1) | UDP | Media | ANY | ANY | 54.169.127.128 – 54.169.127.191, 3.1.77.0 – 3.1.77.255 |
10,000 – 20,000 |
| singapore (sg1) | TCP & UDP | STUN Connection | ANY | ANY | 13.229.255.0 – 13.229.255.31, 54.169.127.128 – 54.169.127.191, 18.141.157.128 – 18.141.157.255 |
443, 3478 (TCP and UDP), 5349 TCP |
| india (in1) | TCP & UDP | STUN Connection | ANY | ANY | 52.66.193.96 – 52.66.193.127, 52.66.194.0 – 52.66.194.63, 3.7.35.128 – 3.7.35.255 |
443, 3478 (TCP and UDP), 5349 TCP |
| ashburn (us1) | UDP | Media | ANY | ANY | 54.172.60.0 – 54.172.61.255, 34.203.250.0 – 34.203.251.255 |
10,000 – 20,000 |
| ashburn (us1) | TCP & UDP | STUN Connection | ANY | ANY | 34.203.254.0 – 34.203.254.255, 54.172.60.0 – 54.172.61.255, 34.203.250.0 – 34.203.251.255, 3.235.111.128 – 3.235.111.255 |
443, 3478 (TCP and UDP), 5349 TCP |
| oregon (us2) | TCP & UDP | STUN Connection | ANY | ANY | 34.216.110.128 – 34.216.110.159, 54.244.51.0 – 54.244.51.255, 44.234.69.0 – 44.234.69.127 |
443, 3478 (TCP and UDP), 5349 TCP |
| roaming (gll) | UDP | Media | ANY | ANY | Playbooks uses roaming (GLL) location. This requires networks to allow all IP addresses listed above. See additional GLL Requirements below. | 10,000 – 20,000 |
† The client will select any available port from the ephemeral range. On most machines, this means the port range 1,024 to 65,535.
Because Playbooks will initiate the agent leg connections, not Twilio, your firewall needs to allow outgoing TCP and UDP traffic and allow return traffic in response. Therefore, your firewall should not allow externally initiated connections into the network.
How is traffic secured?
Twilio signaling takes place over the websocket. This is over WSS (TLS) to port 443 using TLS 1.2.
Media traffic is passed via UDP, using DTLS-SRTP (AES_CM_128_HMAC_SHA1_80) for encryption.
VPN Considerations
When using a NAT (Network Address Translation), the user’s browser will communicate with the nearest available STUN server to their physical network location. VPN users, however, will connect to the edge nearest the VPN network’s physical location, which may not be optimal for users in very different geo-locations and may cause poor audio quality. Also, to avoid inadvertently having no audio if a different edge ends up resolving, it is prudent to allow traffic to all the IPs listed in table above for STUN Connections on VPN networks.
If users are still experiencing issues due to VPN settings, we recommend setting up a split tunnel where computer-based calling traffic is excluded from the VPN. This will need to be done by the IT team that manages the VPN traffic, as setup will be unique to each environment.
Global Low Latency (GLL) Requirements
GLL is an AWS Route53 feature that resolves a hostname to the edge location with the least latency. However, in order for GLL to give accurate results, the intermediate DNS must:
- Support RFC 7871 – Client Subnet in DNS Queries
- Reside in the same edge as the Client endpoint. For example, a host in the US configured with a VPN to Europe or configured with a DNS server that resides in Europe will result in connecting that host to Twilio edge in Europe
If the intermediate DNS does not support RFC 7871 and the upstream DNS IP address is an Anycast address e.g. 8.8.8.8 then there is no guarantee Route53 will accurately determine the best edge to connect to.
To determine if your DNS supports GLL, use the dig command as follows:
dig edns-client-sub.net TXT
Or using nslookup:
nslookup -type=txt edns-client-sub.net
A DNS server that supports this RFC will have ecs set to True and contains an ecs_payload object:
Example:
edns-client-sub.net. 30 IN TXT “{‘ecs_payload’:{‘family’:’1′,’optcode’:’0x08′,’cc’:’US’,’ip’:’34.225.44.0′,’mask’:’24’,’scope’:’0′},‘ecs’:
‘True’,’ts’:’1588973397.05′,’recursive’:{‘cc’:’US’,’srcip’:’208.69.32.67′,’sport’:’11807′}}”
A server that does not support this RFC will have ecs set to False.
Example:
edns-client-sub.net. 0 IN TXT “{‘ecs’:’False’,’ts’:’1588973475.23′,’recursive’:{‘cc’:’US’,’srcip’:’76.96.15.65′,’sport’:’54989′}}”
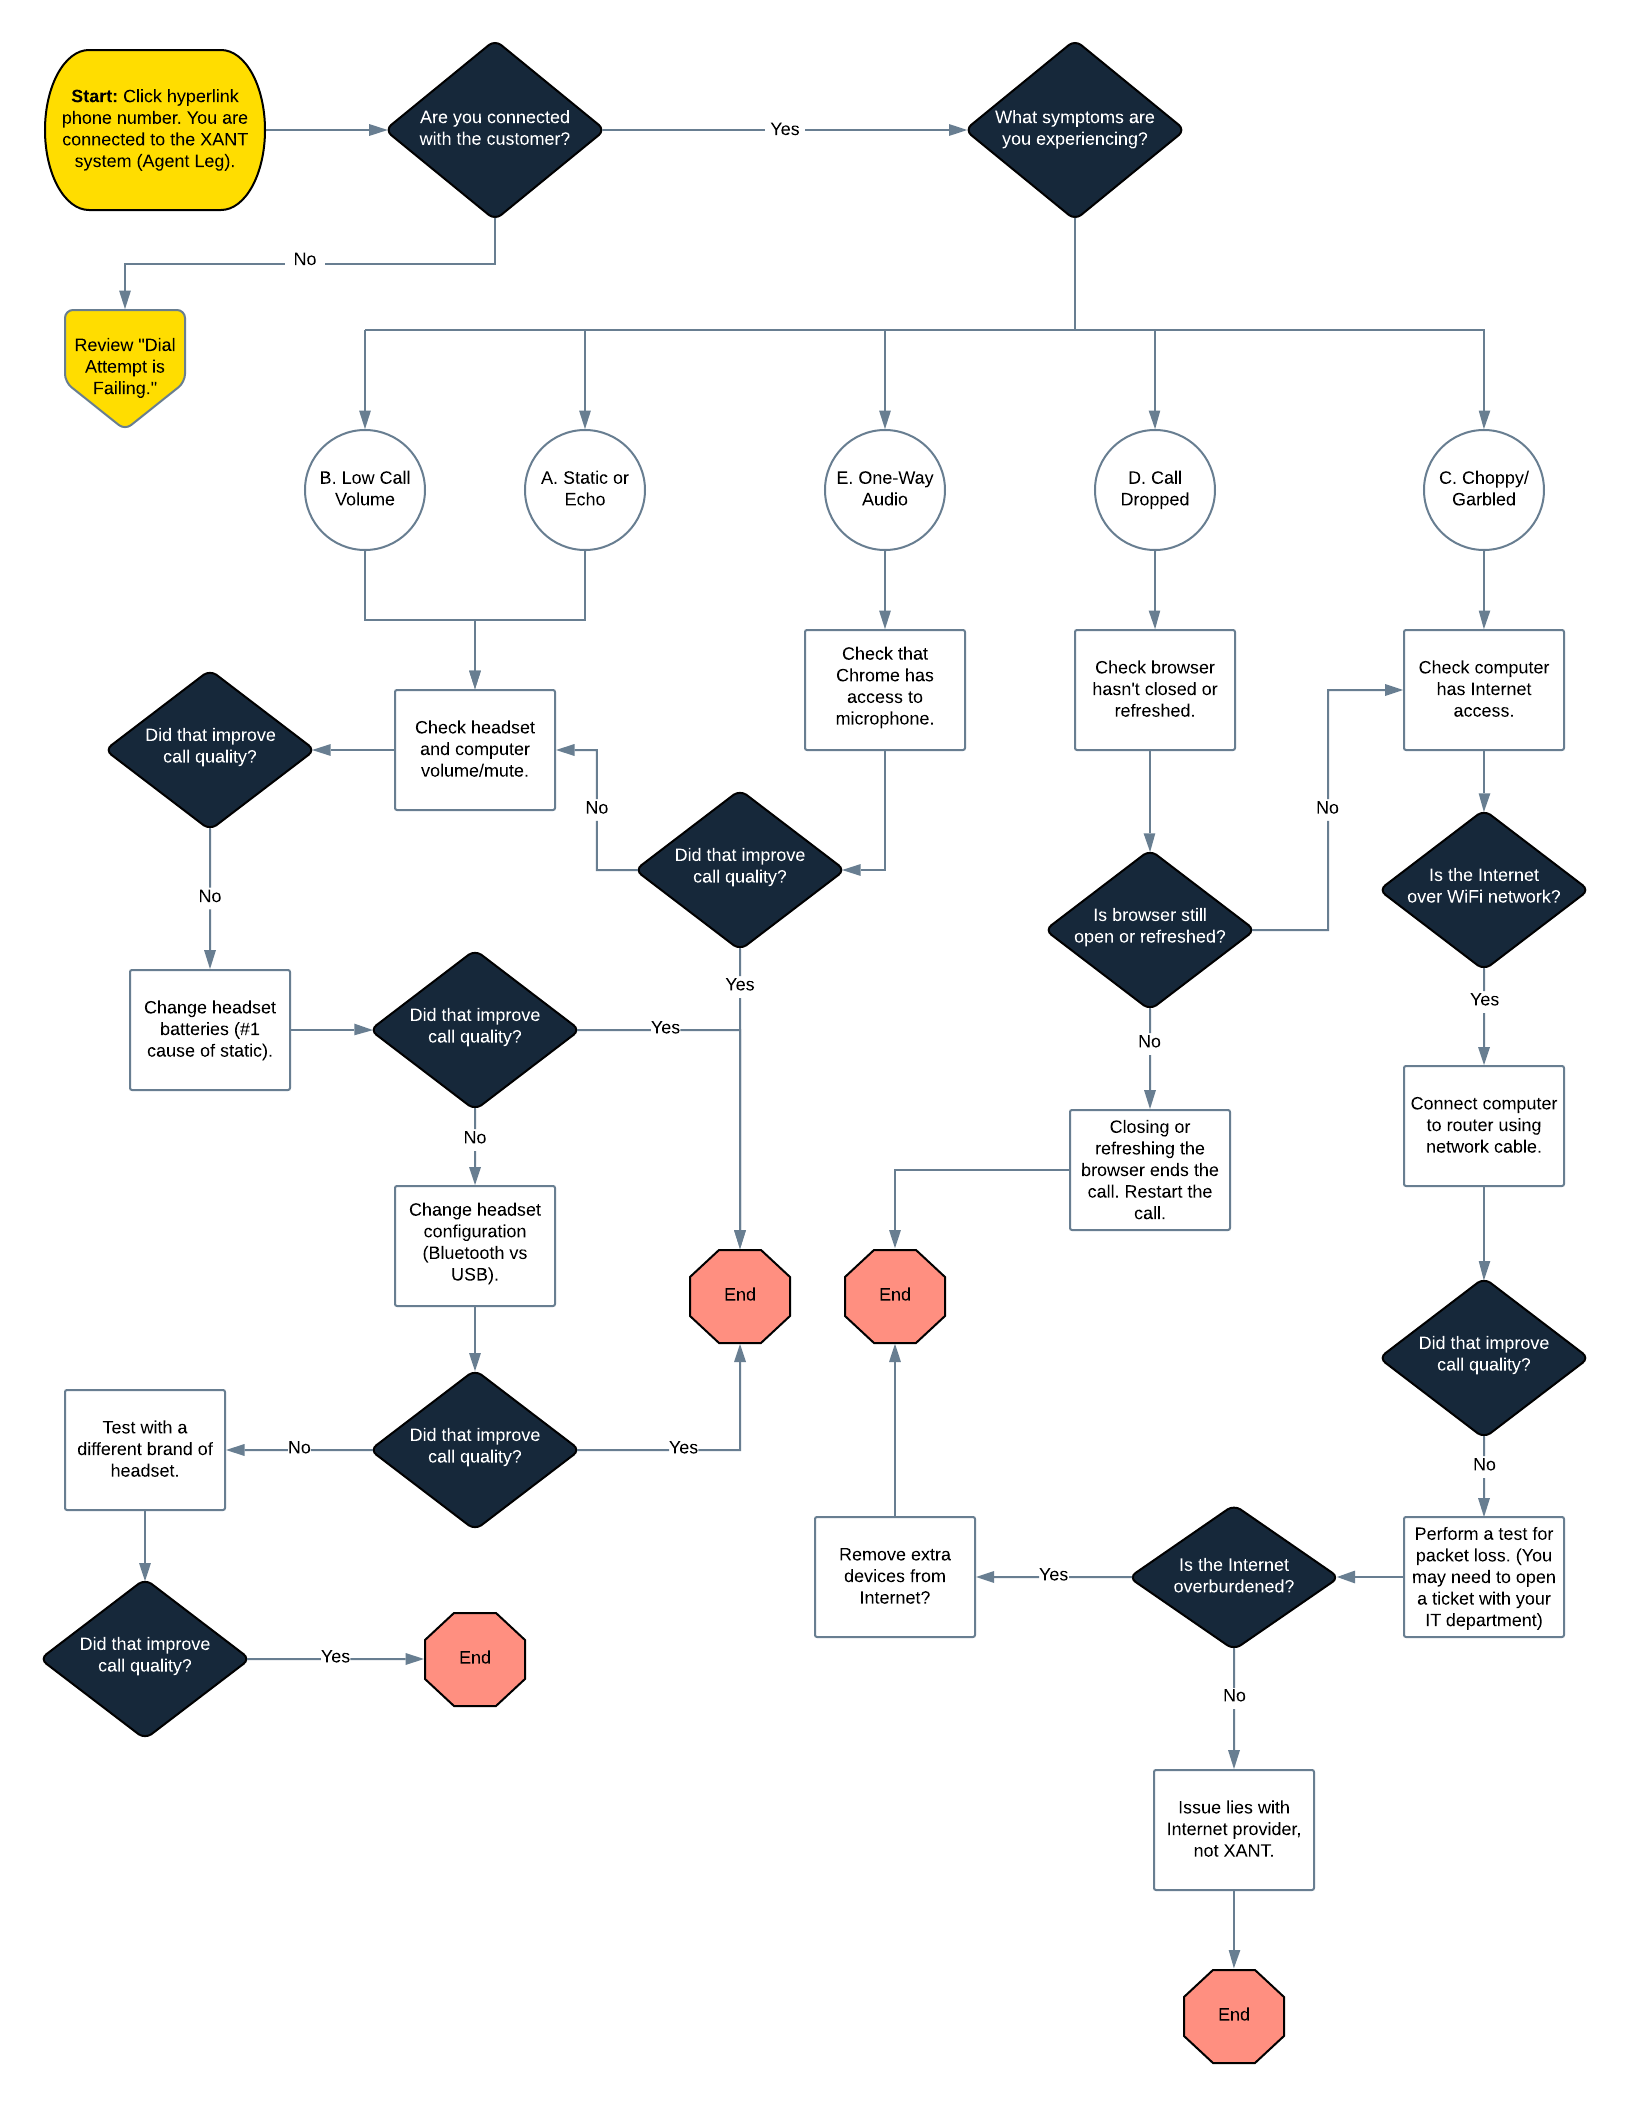
Computer-based Calling Troubleshooting
Call quality issues are tricky because the problem could lie with any number of systems involved in the call (your internet carrier, your data network, your headset or equipment, Playbooks, etc). Using Computer-based Calling adds complexity to the issue due to mobile network quality or internet bandwidth.
Self-diagnosis and resolution are often possible if you know what to look for. Use the following flow diagram to identify the issue by symptom, perform basic troubleshooting, and know what your next step should be.
|
Internet and Network |
||
|---|---|---|
| 1 | If computer is using Wi-Fi network, connect to the router using a network cable. | If call quality is a result of using a Wi-Fi network, users will need to work with their internal network/IT group to resolve. |
| 2 | If using a VPN, verify the VPN is not the root of the issue by testing outside the VPN. | Users will need to work with their IT group to setup a testing session outside the VPN. (We have found that if VPN is the root cause, it will typically impact all users, not always, but often enough to annotate as a common symptom.) |
| 3 | If using VoIP or softphone, verify optimal configuration with Playbooks. | Codec g711 works best with Playbooks platform. IT groups can discuss this with XANT Telephony team if they have questions. |
| Verify there is no packet loss by pinging 8.8.8.8 while making an outbound dial impacted by poor call quality. Work with your IT group to identify if packet loss is an issue. If packet loss is discovered, IT groups will need to work with customer’s ISP to resolve. | ||
| 4 | Verify internet speed is not responsible for degraded call quality. | Perform an internet speed test. |
| 5 | Verify call quality is not caused by damaged, old, or poorly powered equipment. |
Test call quality with a different headset (preferably new or verified as working). |
| Replace or fully charge all batteries, including headsets. | ||
