Call Path Elements
How Call Path elements are Configured
Element Details
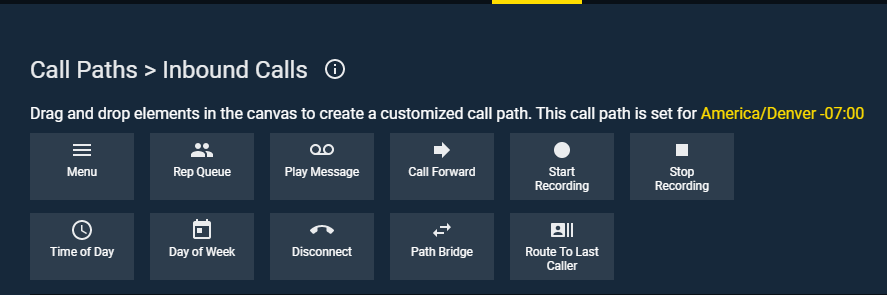
Below are the available elements that can be added to a Call Path. When you click the vertical ellipses on each element, you get the ability to edit and/or delete it. Clicking edit is how you configure each element.
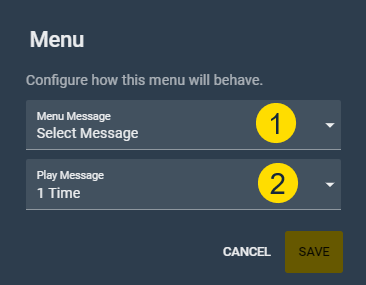

Menu – Plays a message to a caller and gives them the option to choose which branch of the Call Path to move forward in.
- Menu Message – Selects which pre-recorded message plays from a drop-down menu. This message should explain the various branches connected to this menu.
- Play Message – Adjusts how many times the message plays. If the caller does not make a selection by the time the message ends, they will be routed to the default branch.
- Menu Branch – Assigns the number for each branch when you connect Menu to the next element.
- Default – Automatically routes calls to the connected branch if the call meets no other criteria. You must select this for one of the branches before the element will be configured.
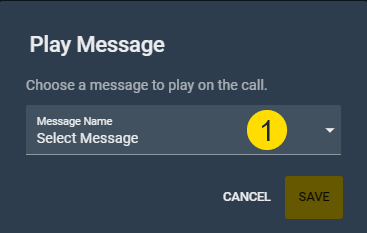
Play Message – Plays a message to the caller instructing them what to expect as the call routes.
- Message Name – Selects which pre-recorded message plays from a drop-down menu.
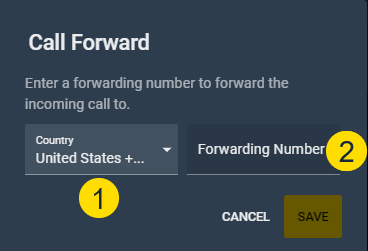
Call Forward – Sends the phone call to a specified phone number.
NOTE: The number must be a direct number. No numbers with extensions can be used.
- Country – Enters the country code for the forwarding number.
- Forwarding Number – Forwards the call to the number typed in this box.
Start Recording – Starts recording the call. There are no configurations on the Start Recording element.
Stop Recording – Stops recording the call. There are no configurations on the Stop Recording element.
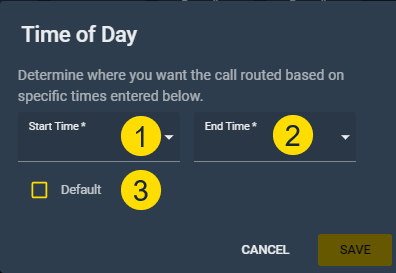
Time of Day – Routes calls differently based on the time of day corresponding to the time zone of the call path. Time of Day configuration window does not open until you connect it to the next element.
- Start Time – Sets the start of the workday, or when calls can begin routing to this branch.
- End Time – Sets the end of the workday, or when calls will stop routing to this branch.
- Default – Automatically routes calls to the connected branch if the call meets no other criteria. You must select this for one of the branches before the element will configure.
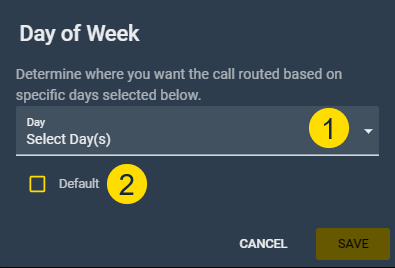
Day of Week – Routes calls differently based on the day of the week. For example, workdays vs. weekends. Day of Week configuration window does not open until you connect it to the next element.
- Day – Selects the days calls will be routed to this branch.
- Default – Automatically routes calls to the connected branch if the call meets no other criteria. You must select this for one of the branches before the element will configure.
Disconnect – Ends an inbound call. There is no configuration on the Disconnect element. This element can be used at the end of a branch where no routing will take place.

Path Bridge – Forwards an inbound call to another call path. The other Call Path must be created before you will be able to select it in the Path Bridge element.
- Call Path – Selects the other Call Path from a drop-down menu.
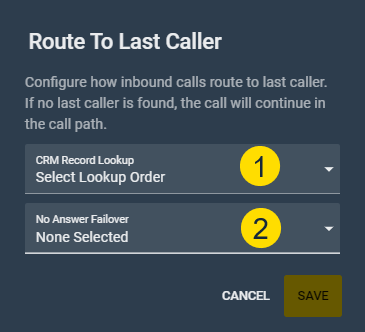
Route to Last Caller – Sends an inbound call to the agent who most recently dialed the number identified by the incoming caller ID.
- CRM Record Lookup – Identifies which CRM objects should be queried to lookup the incoming phone number.
- No Answer Failover – Determines what the call does if the rep does not answer. Choices include Continue Call Path or Last Caller’s Station. If Last Caller’s Station is the selected and no record can be found, the call will be ended by the system.
When a prospect returns a call to a LocalPresence number, the call will automatically be routed back to the last caller. Click this message to read more.
Rep Queue
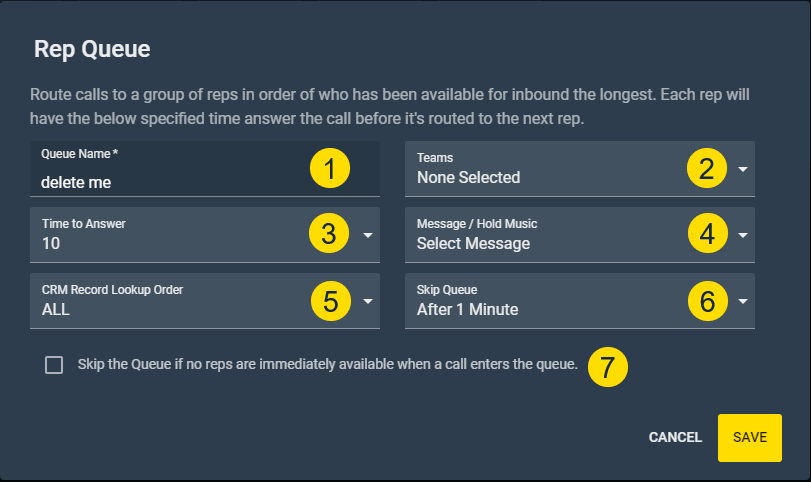
Rep Queue – Automatically routes inbound calls between multiple reps.
- Queue Names – Establishes the name of the Rep Queue. This is the name reps will see when the inbound call rings their station.
- Teams – Selects the Teams or individuals who will be included in this Rep Queue. You can add individuals to the rep queue by clicking the drop-down arrow next to the rep’s Team.
- Time to Answer – Establishes how long each rep has to answer the call. Keep this time as short as possible to prevent the caller from having excessive wait time.
- Message/Hold Music – Sets what the caller hears while waiting in the rep queue. Choose between a pre-recorded message or hold music.
- CRM Record Lookup Order – Indicates the CRM objects to be queried, and in what order, to look for the matching inbound number. If a match is found, the name and company is presented to the rep. Only select the objects needed since this will increase API usage.
- Skip Queue – Established how long the caller is in the Rep Queue total before failing over.
- Checkbox – Gives the call path the option to skip the queue if no one is available. Selecting this will prevent the caller from being placed in the queue unnecessarily.
