Self Service Calendaring
How do I add a calendar link to an email? How can my prospects schedule a meeting with me?
The dream for every sales rep is to open their calendar each morning to find their calendar already filled with appointments from interested prospects or customers. With self-service calendaring, reps can now send emails via Playbooks that contain personal calendaring links, enabling their prospects to self-select times to meet with reps.
Setting Up Self-Service Calendaring
Before being able to add calendar links to emails, each rep will need to go and configure their calendar to work with Playbooks. Before they can link their calendar to Playbooks, they will need to connect their email to Playbooks first. Reps can then configure their calendar by going to Settings in Playbooks and clicking the Calendar menu option.
To Setup Calendaring in Playbooks
- Click the Menu.
- Click Settings.
- Click Calendar.
- Connect Your Email Account.
- Navigate to the Sign in with Google page.
- Select the email you’d like to connect to Playbooks.
- Enter your password and click Next.
- Click Allow.
Reps can save the Meeting Details for Calendaring events sent through Playbooks. These details appear in the email sent to customers so be sure to include information the customer will need before the meeting.

To Configure the Meeting Details
- Open Playbooks.
- Click the menu button (XANT logo).
- Click Settings.
- Click Calendar.
- Configure any or all of the Meeting Details:
- Link Title
- Meeting Title
- Meeting Description
- Meeting Location
- Meeting Duration
- Availability/Business Hours Time Range
- Click SAVE.
Ad hoc Calendar Invites
Send calendar invites any time with an ad hoc calendar invite. Reps can view their availability, format invitations, and add additional contacts without having to leave Playbooks. Using the ad hoc calendar invite allows managers to report on how many invitations were sent by each rep.
To Send an Ad Hoc Calendar Invite
- Open an existing People, Account, or Task record.
- Click the Ad-hoc Schedule button.
- Create the meeting invite details.
NOTE: Clicking MY SCHEDULE lets you select a meeting time and shows your current schedule for the day selected. - Edit the message details.
- Click SEND.
Converting an Email to a Calendar Invite
Reps can convert ad hoc emails or Click-to-Email messages to a calendar invite.
To Convert an Email to a Calendar Invite
- Open an ad hoc email or Click-to-email message.
- Click Switch to Calendar Invite.
NOTE: Click Switch to Email to change the message back to a regular email. - Create the meeting invite.
- Click SEND.
Adding Calendar Links to Emails
Reps can easily insert links to their calendar into emails with a single click. While editing an email, simply click the calendar icon and their unique calendar link is automatically inserted into emails.
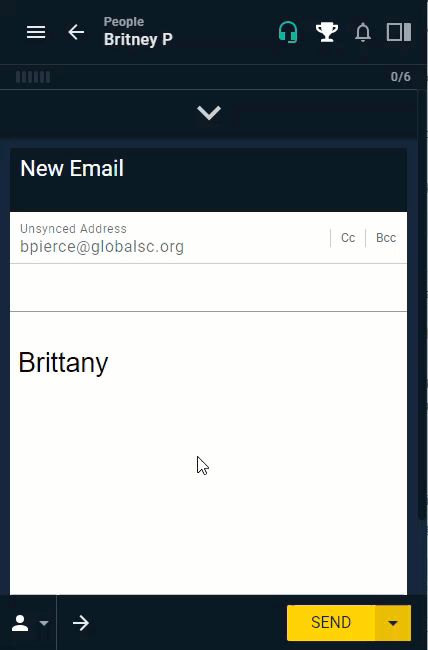
To Add a Calendar Link to an Email
- Open an Email Task or Template.
- Click on the Calendar Icon in the toolbar.
- Complete email as normal.
- Click SEND.
Prospect Self-Service Calendaring
When a prospect or customer clicks on the calendar link from an email, they are brought to the rep’s calendar where they can find a time when they are both available to meet.
Once an individual clicks schedule, a meeting confirmation email is sent to the rep’s inbox and an event appears on the rep’s calendar. An invite is sent to the prospect as well. Reps will be notified before the meeting based on the reminder settings in their calendar.
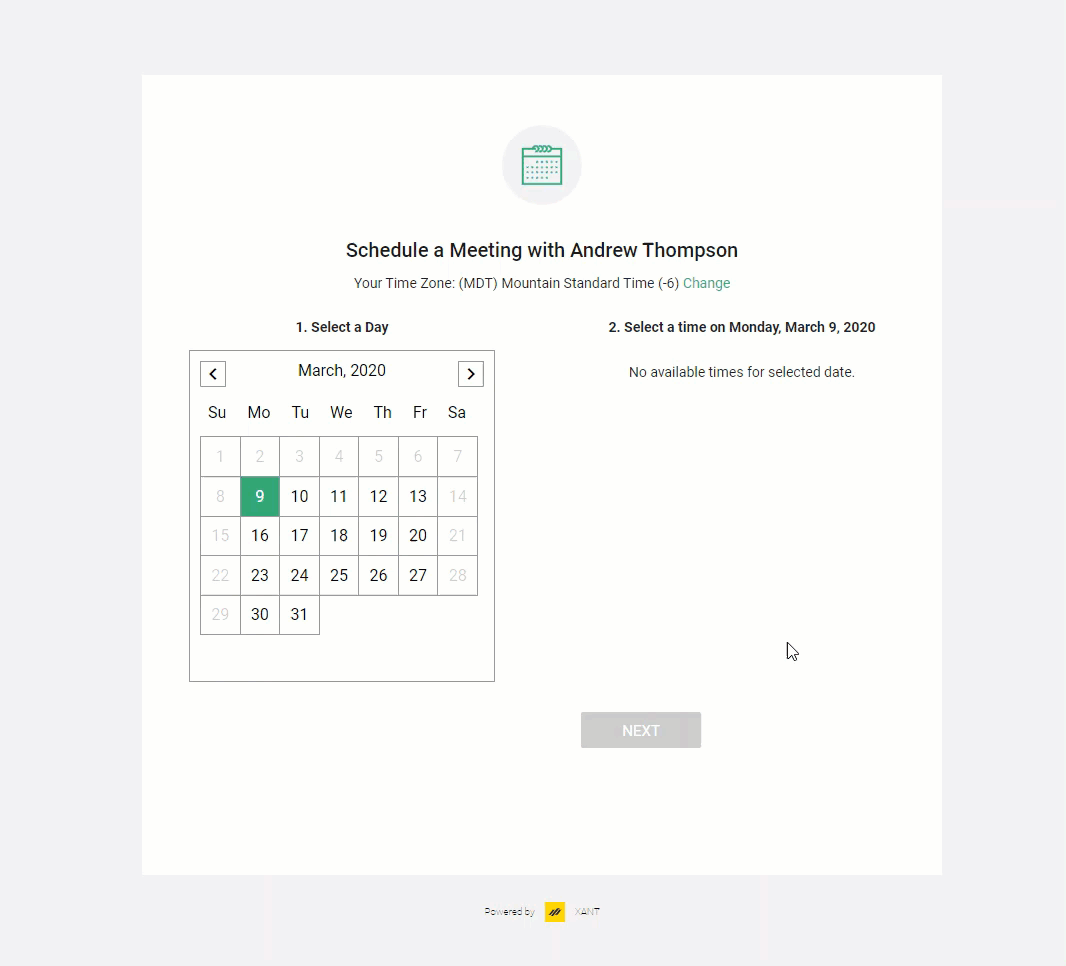
To Schedule a Meeting the Prospect Will
- Select a Day.
- Select a Time.
- Click Next.
- Enter Full Name and Email.
- Click Schedule.
